How to send money using Smiles Mobile Remittance
Money
Hello Smillers! Some of you may already know what Smiles is. But for Smilers who just came to Japan or are new to the family, first and foremost I would like to welcome you to the Smiles family.
Here at Smiles Mobile Remittance, we aim to provide migrant workers with a fast and reliable service that will let them send money (remit) easily to their families and loved ones. We want to spread Smiles across the miles! In this article, we will show you how you can easily remit anytime and anywhere using your mobile phone.
Table of contents
1. Register
The first thing that you should do is download the Smiles Mobile Remittance application via the Apple store or Google Play. You can download the application here. Once the Smiles Mobile Remittance app has been downloaded to your phone, you will now have to make a new Smiles account and register.
The registration process is easy! All you need to do is take a picture of your Japan residence card (在留カード), take a selfie, input your address and you are ready to remit.
2. Deposit
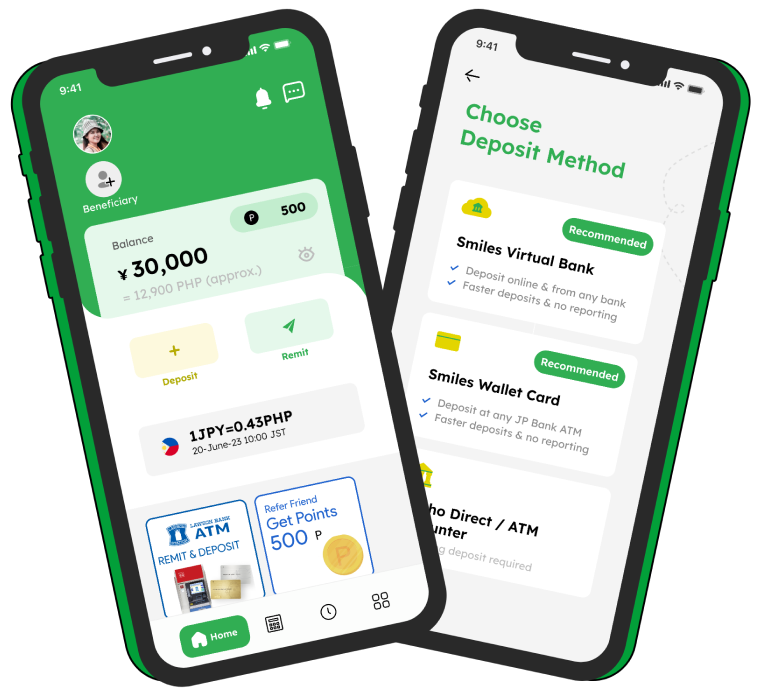
After you have made your account, you can start remitting to your loved ones. Before you remit, you will have to deposit money into your Smiles wallet. You can do that by tapping the balance in your application or if you tap the button “Remit” at the bottom of the screen, the deposit option will appear. Once you tapped it, select “transfer via your bank account” and go to the nearest ATM of your bank and transfer the money to the account that is stated there.
After transferring the money you will get a receipt from the ATM machine. Please take a picture of the receipt and send it to us through the “Report Deposit” button at the bottom of the screen. After taking a picture of the receipt and entering the amount that you deposited, tap the submit button and the amount you deposit will be in your balance.
3. Add beneficiary/beneficiaries
To add beneficiaries, you can tap the “Add beneficiary” button and choose the destination country and you can choose to send it to the beneficiary’s bank account (credit to bank account) or the “cash pick up” option.
If you select “credit to bank account”, enter all the necessary fields such as the beneficiary bank account, branch name and account number and click “next”. After that, you will need to fill in the information of the beneficiary such as relationship and address. Once you are done keying it in, the beneficiary will be saved to the account.
If you select “cash pick up”, you will need to select which store your beneficiary would receive the money from and press next. The process after that will be the same as the one mentioned above, such as stating the beneficiary relationship with you and address.
4. Send money! Start remitting!
Once you have deposited into the Smiles wallet and you have added your beneficiary, all you have to do now is start the remittance process! The steps to remitting are easy and you can do it anytime & anywhere. Sending money with Smiles was made easy for our customers.
First, tap the “Remit” button at the bottom of the screen and tap “Remit” again. Once you have done that you will be able to choose which beneficiary you want to send it to.
After selecting the beneficiary, you can then input the amount that you want to send. If you have enough points, your transaction could be free since the points can be used to reduce or cover the transaction fees! After that please select the purpose of the transaction and tap the “ok” button.
The money you remit will be in your beneficiary’s account within minutes!
We hope that this article has helped you understand Smiles better and now you will be able to spread Smiles across the miles with us! If you have any inquiries, you can contact us on Facebook and leave us a message. We would be more than happy to assist you!
Related articles:
International Money Transfer Service, Smiles Mobile Remittance, Receives 2021 Good Design Award


